
iPhone
Step 1.
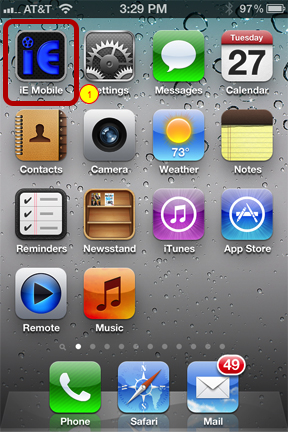
1. Locate the iiE Mobile application on your iPhone and tap it to launch it.
Step 2.
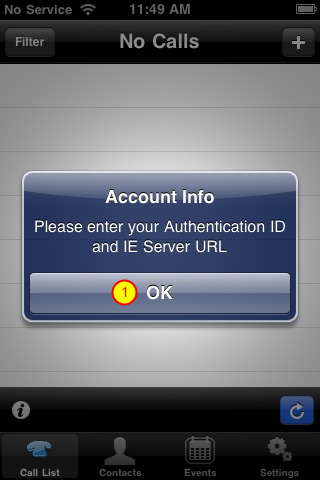
1. If no account information is detected when the application launches you will be prompted to put in the settings. Tap the "OK" button to continue.
Step 3.
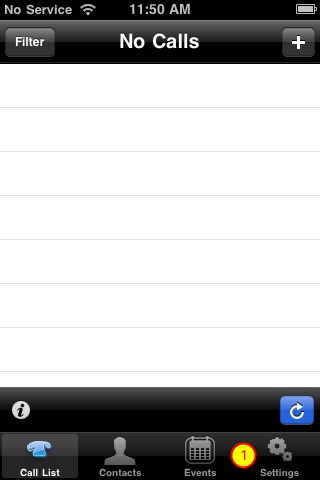
1. Tap on the "Settings" button to setup your server connection.
Step 4.
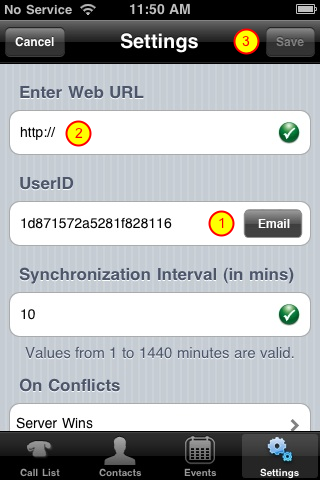
1. Tap the "Email" button on the UserID line. When the email opens tap the send button.
2. When your user ID has been recieved by inEntertainment, they will email you back the URL for your server. Type or paste that info into this spot.
3. Tap the "Save" button at the top of the secren.
Step 5.
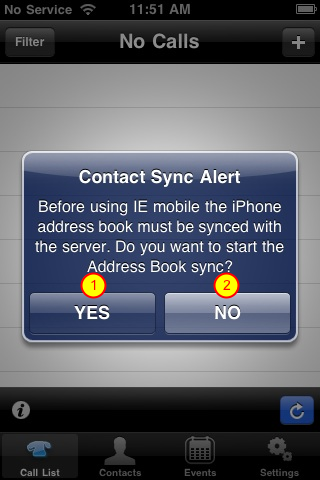
If you have successful entered the URL and Email ID parameters you will be prompted to sync the inEntertainment Addresses to your device. You have three choices.
1. "Yes" will start the addresses sync from inEntertainment down to the device, creating an inEntertainment Group in the Contacts.
2. "Not Now" bypasses the addresses sync and will prompt you to do so the next time you enter the application.
Step 6.

The initial sync could take some time depending on the number of contacts you have and the number of calls on your Call List.
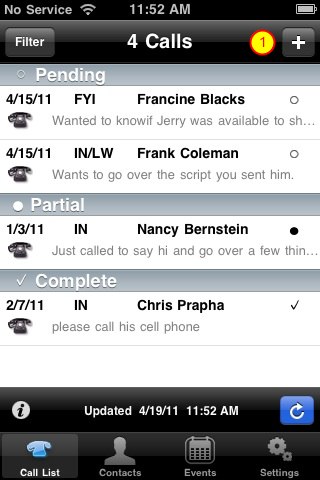
Using the Call List
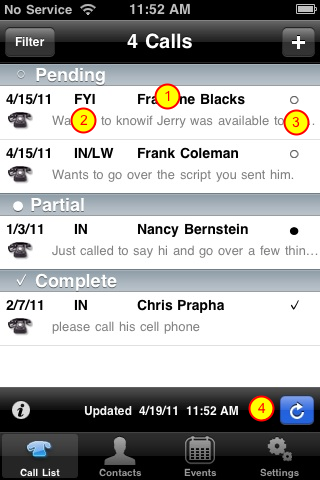
1. Tap on a call to open it and see more information or to return the call. (See Step 1.)
2. Tapping the Kind on the call will allow you to change the kind it is.
3. Tapping on the Status of a call to change it.
4. Single tap the blue button will refresh the Call List. Double tap the button to reload the Call List.
Step 1.
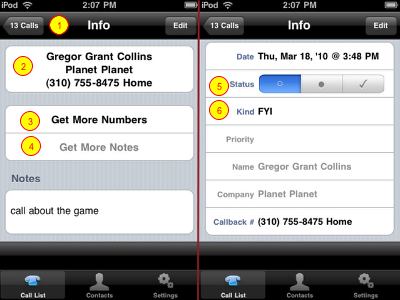
When the selected call opens there are several things you can do.
1. Tap this button to return to your Call List.
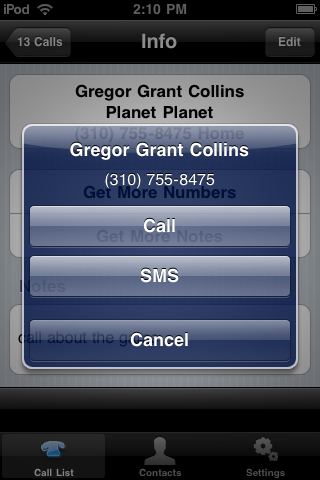
2. Tap on the contact to Call or SMS. (See pic 1A)
3. If the contact has more phone numbers or email addresses you tap this button to display them.
4. If the Call notes are substantial only part of them will be displayed. Tap the "Get More Notes" button to retrieve the rest of the notes.
(Scroll Down)
5. You can change the Status of a call by selecting None, (the open circle), Partial (the dot) or Completed, (the check mark).
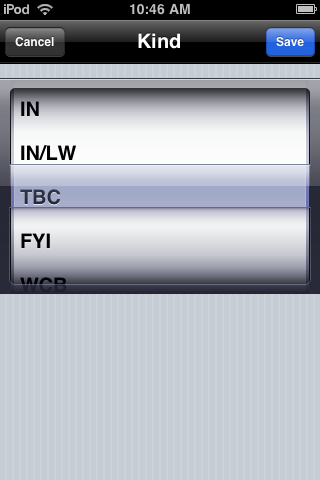
6. The Kind of call can be changed by tapping on the filed. (See pic 1B)
1A
1B
Adding a Call Step 1.
1. Tap on the "Plus" sign in the upper right corner to add a call to your Call List.
Step 2.
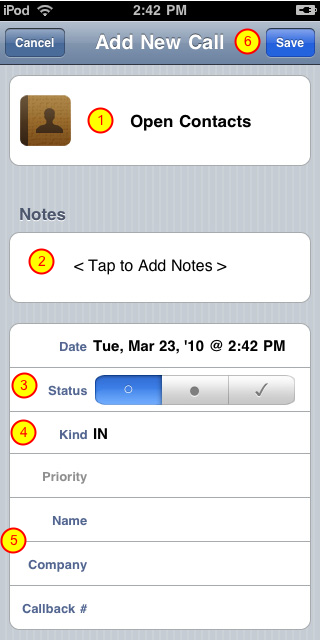
1. To add a Call from one of your Contacts on the device. Tap the "Open Contacts" button and select the contact.
2. To add notes what the call was about tap in the box.
3. Set the Status of the call. None, Partial or Completed.
4. Set the Kind of call you placed. In Coming call, Out Going, to Be Called, etc.
5. If the person you called is not in your contacts you can click the "Name, Company and Callback #" Fields to manually type in their information.
6. Tap the "Save" button in the top right corner to add the call to your call list when done.
Filtering & Sorting the Call List
1. Tap the "Filter" button to choose your filtering and sorting options.
Step 2.
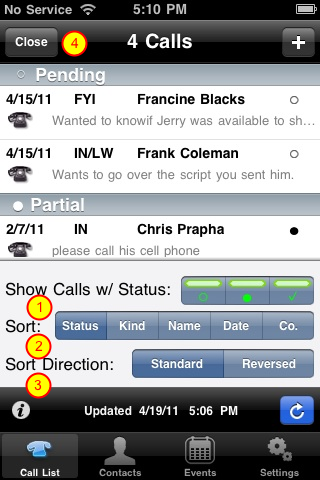
1. Tapping the boxes will hide or show calls of that status.
2. You can sort your calls by Status, Kind, Date or Company, (The Default is Status).
3. Standard direction of the sort order places the newest calls on top. If you would like the newest calls on the bottom, like an instant message program choose "Reversed"
4. Tap the "Close" button in the upper left corner when finished.
Using the Calendar on the iPhone
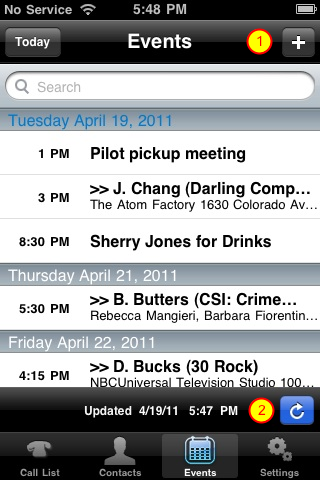
Navigate to the Events tab on the iE Mobile App.
Flick up and down on the screen to scroll through the list of events.